
스프링 부트에서 JSP view 설정하기.
13 Dec 2018 | Spring JSP기본적으로 spring-boot-starter-web 에 포함된 tomcat은 JSP를 포함하지 않는다.
하지만 간단한 설정만으로도 JSP view를 사용 가능하다.
일단 dependency를 pom.xml 에 추가한다.
pom.xml 에 아래 구문 추가.
....
<!-- JSP 쓰기 -->
<dependency>
	<groupId>org.apache.tomcat.embed</groupId>
	<artifactId>tomcat-embed-jasper</artifactId>
</dependency>

<dependency>
	<groupId>javax.servlet</groupId>
	<artifactId>jstl</artifactId>
</dependency>
....
application.properties 에 추가할 내용 (jsp 파일이 들어갈 경로 및 확장자 지정.)
spring.mvc.view.prefix=/WEB-INF/jsp/
spring.mvc.view.suffix=.jsp
jsp 페이지 추가.
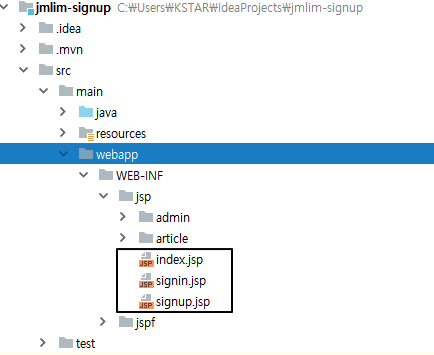
ex) signin.jsp
<!DOCTYPE html>
<%@ page language="java" contentType="text/html; charset=UTF-8"
	pageEncoding="UTF-8"%>
<html>
<head>
<meta http-equiv="Content-Type" content="text/html; charset=UTF-8">
<title>로그인</title>
</head>
<body>
로그인 페이지가 될 부분.
</body>
</html>
컨트롤러 작성.
import java.util.Date;
import java.util.Map;

import org.springframework.stereotype.Controller;
import org.springframework.web.bind.annotation.GetMapping;

@Controller
public class SignController {

  @GetMapping("/")
  public String index(Map<String, Object> model) {
    model.put("time", new Date());
    return "index";
  }

  @GetMapping("/signin")
  public String siginin(Map<String, Object> model) {
      model.put("time", new Date());
      return "signin";
  }

  @GetMapping("/signup")
  public String siginup(Map<String, Object> model) {
    model.put("time", new Date());
    return "signup";
  }
}
url 호출
- http://localhost:8080
- http://localhost:8080/siginin
- http://localhost:8080/siginup
위 url 을 차례대로 실행 시 각각 index.jsp, siginin.jsp, siginup.jsp 파일이 띄워짐을 확인할 수 있다.
Comments